Thứ Hai, 13 tháng 1, 2014

Create a CSS Image Slider with Thumbnails for Blogger

Image galleries/sliders are particularly useful for photoblogs, but they could also be useful for users who occasionally need a gadget like this. We already posted a tutorial on how to add Thumbnail Image / Photo Gallery in Blogger with a big thumbnail at the top and smaller thumbs at the bottom which were enlarged each time an image was selected. The difference is that we had to click on the image in order to make it larger and that was acquired with JavaScript.

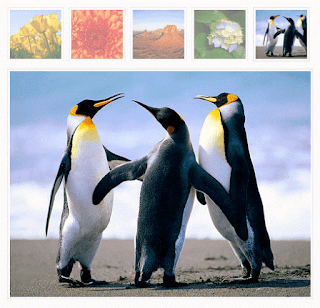
This time, however, we will use only hover and CSS. To see how it works, please visit the demo blog:


How to Add CSS Image Slider with Thumbnails in Blogger

Step 1. Log into your Blogger Dashboard and go to "Template" > press the "Edit HTML" button.


Step 2. Click anywhere inside the code area and press the CTRL + F keys to open the Blogger search box


Step 3. Paste the </head> tag inside the search box and hit Enter to find it.

Step 4. Just above the </head> tag, add the CSS code:
<style type='text/css'>
.image-container {
position: relative;
width: 100%;
height: 530px;
margin: 0 auto;
text-align:center;
overflow: hidden;
}
.image-container a {
display: inline;
text-decoration: none;
}
/* Mini-thumbnails style */
.mini-thumbnail {
width: 18.4%; /* mini-thumbnails width */
margin:1px;
opacity: 1;
-webkit-box-shadow: 0px 0px 3px rgba(0,0,0,0.5);
-moz-box-shadow: 0px 0px 3px rgba(0,0,0,0.5);
box-shadow: 0px 0px 3px rgba(0,0,0,0.5);
}
/* Style for the main thumbnail */
.large-thumbnail {
position: absolute;
width: 100%;
top: 800px;
margin:0 auto;
text-align: center;
display: block;
-webkit-transition: top 1s ease;
-moz-transition: top 1s ease;
-o-transition: top 1s ease;
-ms-transition: top 1s ease;
transition: top 1s ease;
}
.feature {
top: 85px;
width: 100%;
opacity: .3;
}
/* style for the selected mini-thumbnail */
a:hover .mini-thumbnail {
opacity: .5;
-webkit-box-shadow: 0px 0px 10px rgba(0,0,0,0.5);
-moz-box-shadow: 0px 0px 10px rgba(0,0,0,0.5);
box-shadow: 0px 0px 10px rgba(0,0,0,0.5);
}
/* transition effects for the selected image */
a:hover .large-thumbnail {
top: 85px;
width: 100%;
z-index:3;
opacity: 1;
-webkit-transition: top 1s ease;
-moz-transition: top 1s ease;
-o-transition: top 1s ease;
-ms-transition: top 1s ease;
transition: top 1s ease;
}
</style>
Here we set a specific height of 530px so that we can slide an image out of the container margins and set the overflow value to hidden.

The position: absolute of the larger thumbnails (.large-thumbnail) pulls them out and places them in the spot that we've chosen using a value of 800px for the top property.

The mini-thumbnails which are actually a second image, stay all the time above in a static position and are slightly modified only in terms of style for distinguishing the active (a:hover .mini-thumbnail) on mouse over.

Step 5. Save the changes by clicking the "Save template" button.

And finally, we need to add the HTML code.

Step 6. Paste the below HTML structure to where you want to display the gallery by going either to the "Layout" page and add a new gadget (click on the "Add a gadget" link and choose "HTML/JavaScript"), or inside a post or page within the "HTML" section.
<div class="image-container">
<a href="javascript:void(0);">
<img class="mini-thumbnail" src="MINI-THUMB-URL1" />
<img class="large-thumbnail" src="LARGE-THUMB-URL1" />
</a>
<a href="javascript:void(0);">
<img class="mini-thumbnail" src="MINI-THUMB-URL2" />
<img class="large-thumbnail" src="LARGE-THUMB-URL2" />
</a>
<a href="javascript:void(0);">
<img class="mini-thumbnail" src="MINI-THUMB-URL3" />
<img class="large-thumbnail" src="LARGE-THUMB-URL3" />
</a>
<a href="javascript:void(0);">
<img class="mini-thumbnail" src="MINI-THUMB-URL4" />
<img class="large-thumbnail" src="LARGE-THUMB-URL4" />
</a>
<a href="javascript:void(0);">
<img class="mini-thumbnail" src="MINI-THUMB-URL5" />
<img class="large-thumbnail" src="LARGE-THUMB-URL5" />
</a>
<a href="javascript:void(0);">
<img class="large-thumbnail feature" src="LARGE-THUMB-URL1" />
</a>
</div>
The javascript:void(0); leaves the link empty but you can add one if you want. Just replace javascript:void(0); with the URL of your page/post.

To add pics inside the image slider, replace MINI-THUMB-URL and LARGE-THUMB-URL with image URLs. Note: The last LARGE-THUMB-URL1 should be replaced with the URL of the default image that will appear on your slider.

If you don't know how to get the images URL, visit this tutorial: How to upload images and get their URLs.

Now, Save your widget/gadget or publish your page/post and you're done adding the CSS image slider with thumbnails in Blogger.

Chủ Nhật, 12 tháng 1, 2014

How to add a thumbnail image/photo gallery in Blogger

For those who would like to show pictures in an image gallery, here's a beautiful gallery made with JavaScript and CSS. This image gallery displays the available thumbnails either vertically or horizontally on top of the chosen picture, thus making it easier for you to pick different images on mouse click.

With the help of CSS, we can make the <img> element to display on same position with the rest of the thumbs and style the thumbnails as small blocks with a defined height and width. The script will add a click-event for each <li> object that changes it's child's <img> visibility and will assign an "active" class name to the <li>.

Related: Image Slider with Mouse Hover Effect using CSS only


How to Add Image Gallery with Thumbnails to Blogger

Step 1. Log in to your Blogger account, select your blog and go to "Template", press the "Edit HTML" button.


Step 2. Click anywhere inside the code area and press the CTRL + F keys to open the search box:


Step 3. Type the following tag inside the search box and hit Enter to find it:
</head>
Step 4. Now pick one of the styles below and copy the code below it:


<style type='text/css'>
#image-gallery {display: none;}
  #jquery-gallery {padding:0;margin:0;list-style: none; width: 500px;}
  #jquery-gallery li {width:84px; height: 80px;background-size: 100%;-webkit-background-size: cover;-moz-background-size: cover; -o-background-size: cover;background-size: cover;margin-right: 10px; border: 3px solid #fff; outline: 1px solid #E3E3E3; margin-bottom: 10px;opacity: .5; filter:alpha(opacity=50); float: left; display: block; }
#jquery-gallery li img { position: absolute; top: 100px; left: 0px; display: none;}
  #jquery-gallery li.active img { display: block; border: 3px solid #fff; outline: 1px solid #E3E3E3; width:490px; max-height: 375px;}
  #jquery-gallery li.active, #jquery-gallery li:hover { outline-color: #DFDFDF; opacity: .99;filter:alpha(opacity=99);}
#gallery-caption {background: rgba(0, 0, 0, 0.3);color: #fff;font-size: 16px;font-weight: bold;left: 3px;position: absolute;text-align: center;top: 103px;width: 490px;text-transform: uppercase;}
</style>


<style type='text/css'>
#image-gallery { display: none; }
#jquery-gallery {padding:0;margin:0;list-style: none; width: 200px; }
#jquery-gallery li {background-size: 100%;-webkit-background-size: cover;-moz-background-size: cover; -o-background-size: cover;background-size: cover;margin-right: 10px; width: 80px; height: 80px; border: 3px solid #fff; outline: 1px solid #ddd; margin-right: 10px; margin-bottom: 10px; opacity: .5;filter:alpha(opacity=50); float: left; display: block; }
#jquery-gallery li img { position: absolute; top: 0px; left: 200px; display: none; }
#jquery-gallery li.active img { display: block; width:370px; border: 3px solid #fff; outline: 1px solid #E3E3E3; }
#jquery-gallery li.active, #jquery-gallery li:hover { outline-color: #bbb; opacity: .99;filter:alpha(opacity=99);}
#gallery-caption {background: rgba(0, 0, 0, 0.3);color: #fff;font-size: 16px;font-weight: bold;text-transform: uppercase;margin: 0 -17px;position: absolute;right: 0;text-align: center;top: 3px;width: 370px;}
</style>
Note: The display: none; for the first ID (#image-gallery) is to prevent images appear with their actual size before they go inside the gallery container.

In #jquery-gallery we have the width of the container for the thumbnails (200px), so that they display in two rows and for this we need to calculate the width of the thumbnail (80px) plus the margins between them.

The left declaration of #jquery-gallery li img is to move the larger thumbnail that shows on mouse click so that it doesn't overlap with the smaller thumbnails.

Step 5. Paste the code of the chosen style just above the </head> tag.

Step 6. Now above the same </head> tag, add this script:
<script type='text/javascript'>
//<![CDATA[
var gal = {
init : function() {
if (!document.getElementById || !document.createElement || !document.appendChild) return false;
if (document.getElementById('image-gallery')) document.getElementById('image-gallery').id = 'jquery-gallery';
var li = document.getElementById('jquery-gallery').getElementsByTagName('li');
li[0].className = 'active';
for (i=0; i<li.length; i++) {
li[i].style.backgroundImage = 'url(' + li[i].getElementsByTagName('img')[0].src + ')';
li[i].title = li[i].getElementsByTagName('img')[0].alt;
gal.addEvent(li[i],'click',function() {
var im = document.getElementById('jquery-gallery').getElementsByTagName('li');
for (j=0; j<im.length; j++) {
im[j].className = '';
}
this.className = 'active';
document.getElementById('gallery-caption').innerHTML = this.title;
});
}
},
addEvent : function(obj, type, fn) {
if (obj.addEventListener) {
obj.addEventListener(type, fn, false);
}
else if (obj.attachEvent) {
obj["e"+type+fn] = fn;
obj[type+fn] = function() { obj["e"+type+fn]( window.event ); }
obj.attachEvent("on"+type, obj[type+fn]);
}
}
}
gal.addEvent(window,'load', function() {
gal.init();
});
//]]>
</script>
Basically, what this script does is to check if there is any ID named "image-gallery" and get the different list items that may exist within it. These elements will be displayed as thumbnails and a function will decide what to do once they are clicked. So, each time we click on a thumbnail, the "active" class will be assigned and the thumbnail should be visible in the larger container.

Step 7. Finally, save the changes by clicking the "Save template" button.

And here's the HTML code providing a normal list with the image-gallery ID, enclosed within a DIV with a relative position in order to avoid side effects of other pre-existing positions.

Step 8. Paste the below HTML to where you want to display the gallery by going either to "Layout" and adding a new gadget (click on the "Add a gadget" link and choose "HTML/JavaScript" option), or inside a post/page in the HTML section.
<div style="position:relative;">
<ul id="image-gallery">
<li><img src="IMAGE-URL1" /></li>
<li><img src="IMAGE-URL2" /></li>
<li><img src="IMAGE-URL3" /></li>
<li><img src="IMAGE-URL4" /></li>
<li><img src="IMAGE-URL5" /></li>
</ul>
</div>
Note: if elements on your page overlap with this gallery, you might need to add the height declaration after "position: relative;". The value of height depends on the size of your gallery.

Example:
<div style="position:relative; height: 500px;"> 
Change IMAGE-URL1 with the image URL. If you don't know how to get the address of an image, see this tutorial: How to Upload Images and Get the URL

In case you need to make the pictures clickable, add this HTML structure instead:
<div style="position:relative;">
<ul id="image-gallery">
<li><a href="page-URL"><img src="IMAGE-URL1" /></a></li>
<li><a href="page-URL"><img src="IMAGE-URL2" /></a></li>
<li><a href="page-URL"><img src="IMAGE-URL3" /></a></li>
<li><a href="page-URL"><img src="IMAGE-URL4" /></a></li>
<li><a href="page-URL"><img src="IMAGE-URL5" /></a></li>
</ul>
</div>
Again, here you need to replace the page-URL text with the URL of your page/post.

Update: To add captions, please include the lines in orange and then replace the "Caption" with the text that you want to appear on each picture:
<div style="position:relative;">
<ul id="image-gallery">
<li><a href="page-URL"><img alt="Caption" src="IMAGE-URL1" /></a></li>
<li><a href="page-URL"><img alt="Caption" src="IMAGE-URL2" /></a></li>
<li><a href="page-URL"><img alt="Caption" src="IMAGE-URL3" /></a></li>
<li><a href="page-URL"><img alt="Caption" src="IMAGE-URL4" /></a></li>
<li><a href="page-URL"><img alt="Caption" src="IMAGE-URL5" /></a></li>
</ul>
<div id="gallery-caption"></div>
</div>

Save the widget or publish your page and you're done adding the thumbnail image / photo gallery in Blogger.

Thứ Năm, 2 tháng 1, 2014

How to Create Magazine Style with Post Summaries and Thumbnails on Blogger

The magazine or newspaper style templates are those that display the posts summaries in the homepage by stacking the columns on top of each other. These kinds of templates are very popular nowadays, and whether it is a news or technology blog, everyone needs a fresh magazine style layout for their blogs.

There are several ways to make posts appear this way. An option would be to use the Read more script to display a summary of the posts and add a conditional tag to add a different style on the first post so that it will have a larger width than the older posts. So, this tutorial will show you how to create a magazine style for a Blogger Template. By following this tutorial, you can make your boring and simple Blogger template have an attractive magazine style layout.

blogger tricks, blogger widgets, blogger templates

To see how it looks, please visit this demo blog.

Adding the Magazine/Newspaper style to a Blogger Template

Step 1. Before proceeding further, please make a backup of your current template to make sure that you won't lose anything important - log into your Blogger Dashboard and go to Template, then click on the Backup/Restore button. After you've got a copy of the xml template, click on the Edit HTML button:

blogger edit html template

Step 2. Click anywhere inside the code area and search by using CTRL + F keys for this line:
<data:post.body/>
Note: You'll find it more than one time, but stop at the second one in order to see the changes.

Step 3. Remove that line and instead of it add this code:
<b:if cond='data:blog.pageType != &quot;item&quot;'>
<b:if cond='data:blog.pageType != &quot;static_page&quot;'>
 <span class='post-comment-link'><b:if cond='data:blog.pageType != &quot;item&quot;'><b:if cond='data:post.allowComments'><a class='comment-link' expr:href='data:post.addCommentUrl' expr:onclick='data:post.addCommentOnclick'><data:post.numComments/></a></b:if></b:if></span>
<div expr:id='&quot;summary&quot; + data:post.id'><data:post.body/></div>
  <script type='text/javascript'>createSummaryAndThumb(&quot;summary<data:post.id/>&quot;);</script>
<span class='readmorebutton' style='float:right'><a expr:href='data:post.url'>Read More &#187;</a></span></b:if></b:if>
<b:if cond='data:blog.pageType == &quot;item&quot;'><data:post.body/></b:if>
<b:if cond='data:blog.pageType == &quot;static_page&quot;'><data:post.body/></b:if>
Note: you can replace the Read More text, by changing the code in red.

Step 4. Now find (CTRL + F) this line:
<b:include data='post' name='post'/>
Step 5. Remove this as well and instead of it add this:
<b:if cond='data:post.isFirstPost'>
<b:if cond='data:blog.homepageUrl == data:blog.url'>
<div id='first'>
<b:if cond='data:post.title'>
<h3 class='post-title entry-title'>
<b:if cond='data:post.link'>
<a expr:href='data:post.link'><data:post.title/></a>
<b:else/>
<b:if cond='data:post.url'>
<a expr:href='data:post.url'><data:post.title/></a>
<b:else/>
<data:post.title/>
</b:if>
</b:if>
</h3>
</b:if>
<div class='first-body'>

<b:if cond='data:blog.pageType != &quot;item&quot;'>
<b:if cond='data:blog.pageType != &quot;static_page&quot;'>
<div expr:id='&quot;summary1&quot; + data:post.id'><data:post.body/></div>
  <script type='text/javascript'>createSummaryAndThumb1(&quot;summary1<data:post.id/>&quot;);</script>
<span class='post-comment-link'><b:if cond='data:blog.pageType != &quot;item&quot;'><b:if cond='data:post.allowComments'><a class='comment-link' expr:href='data:post.addCommentUrl' expr:onclick='data:post.addCommentOnclick'><data:post.numComments/></a></b:if></b:if></span>
<span class='readmorebutton' style='float:right'><a expr:href='data:post.url'>Read More &#187;</a></span>
</b:if></b:if>
<b:if cond='data:blog.pageType == &quot;item&quot;'><data:post.body/></b:if>
<b:if cond='data:blog.pageType == &quot;static_page&quot;'><data:post.body/></b:if>

</div>
</div>
<b:else/>
<b:include data='post' name='post'/>
</b:if>
<b:else/>
<b:include data='post' name='post'/>
</b:if>
Note: you can change the Read More text here also, just replace the code in red with the text that you want to show.

Step 6. Find the </head> tag and paste the following script before/above it:
 <script type='text/javascript'>
posts_no_thumb_sum = 290;
posts_thumb_sum = 240;
img_thumb_height = 80;
img_thumb_width = 80;
first_no_thumb_sum = 580;
first_thumb_sum = 450;
img_thumb_height1 = 145;
img_thumb_width1 = 165;

</script>

<script type='text/javascript'>
//<![CDATA[
function removeHtmlTag(strx,chop){
if(strx.indexOf("<")!=-1)
{
var s = strx.split("<");
for(var i=0;i<s.length;i++){
if(s[i].indexOf(">")!=-1){
s[i] = s[i].substring(s[i].indexOf(">")+1,s[i].length);
}
}
strx = s.join("");
}
chop = (chop < strx.length-1) ? chop : strx.length-2;
while(strx.charAt(chop-1)!=' ' && strx.indexOf(' ',chop)!=-1) chop++;
strx = strx.substring(0,chop-1);
return strx+'...';
}

function createSummaryAndThumb(pID){
var div = document.getElementById(pID);
var imgtag = "";
var img = div.getElementsByTagName("img");
var summ = posts_no_thumb_sum;
if(img.length>=1) {
imgtag = '<span class="posts-thumb" style="float:left;"><img src="'+img[0].src+'" width="'+img_thumb_width+'px" height="'+img_thumb_height+'px"/></span>';
summ = posts_thumb_sum;
}

  var summary = imgtag + '<div class="summary">' + removeHtmlTag(div.innerHTML,summ) + '</div>';
div.innerHTML = summary;
}

function createSummaryAndThumb1(pID){
var div = document.getElementById(pID);
var imgtag = "";
var img = div.getElementsByTagName("img");
var summ = first_no_thumb_sum;
if(img.length>=1) {
imgtag = '<span class="first-post-thumb" style="float:left;"><img src="'+img[0].src+'" width="'+img_thumb_width1+'px" height="'+img_thumb_height1+'px"/></span>';
summ = first_thumb_sum;
}

var summary1 = imgtag + '<div class="summary">' + removeHtmlTag(div.innerHTML,summ) + '</div>';
div.innerHTML = summary1;
}

//]]>
</script>
Step 7. And below the script above add the CSS styles:
<b:if cond='data:blog.pageType != &quot;static_page&quot;'>
<b:if cond='data:blog.pageType != &quot;item&quot;'>
<style type='text/css'>
.first-post-thumb {
    margin-right: 10px;
}

.summary {
    height: 100%;
}

#first { /* Styles for the First Post Container */
    width: auto;
    height: 250px;
    float: left;
    margin-bottom: 10px;
    background-color: #F4F4F4; /* background color for the first post */
    border: 1px solid #E5E5E5; /* border for the first post */}

.first-body { /* Style for the First Post summary */
    color: #545454;
    font-size: 13px;
    text-align: justify;
    padding: 5px 10px;
    line-height: 1.5em;
}

#first h3 a, #first h3 a:visited { /* Style for the First Post Title*/
    border-bottom: 2px solid #DFDFDF;
    color: #515151;
    font-size: 20px;
    display: block;
    margin: 10px auto;
    width: 95%;
    font-size: 20px;
    padding: 0px 0px 4px 0px;
    font-weight: bold;
    text-align: left;
    line-height: 1.4em;
    background: none;
}

#first h3 a:hover { /* Color on mouseover for the First Post Title */
    color: #1061A1;
}

.post { /* Styles for the small posts container */
    float: left;
    margin: 0px 6px 2% 5px;
    width: 46%;
    height: 230px;
    padding: 0px 5px 5px 5px;
    background: #FCFCFC; /* background color for the small posts */
    border: 1px solid #E5E5E5; /* border for the small posts */
    overflow: hidden;
}

.posts-thumb { /* Style for the small posts thumbnails */
    margin-right: 10px;
}

.post-body img, .post-body .tr-caption-container, .Profile img, .Image img, .BlogList .item-thumbnail img {
    background: none;
    border: none;
    box-shadow: none;
    padding: 0;
}


h3.post-title a{ /* Style for the small posts titles */
    font-size: 14px;
    color: #747474;
    text-transform: uppercase;
}

h2.date-header { /* Hide the post date */
    display: none;
}

.post-footer {
    display: none;
}

h3.post-title {
    margin: 0px;
}

.readmorebutton {
    margin-top: 5px;
}

.readmorebutton a { /* Styles for the Read More link */
    color: #767676;
    border: 1px solid #E1E1E1;
    background: #EAEAEA; /* Background color for the Read More link */
    text-decoration: none;
    padding: 3px 5px;
    font-weight: bold;
    font-size: 11px;
    float: right;
    position: relative;
}

.post-comment-link { /* Style for the comment bubble of posts below */
    position: absolute;
    top: -35px;
    right: -10px;
    display: block;
    border: 1px solid #E1E1E1; /* border for the comment bubble */
    background: #EAEAEA; /* background color for the comment bubble */
    font-size: 11px;
    position: absolute;
}

#first .post-comment-link { /* Style for the comment bubble of first post */
    position: absolute;
    top: 10px;
    right: 0px;
}

.post-comment-link a { /* Link color for the comments bubble*/
    padding: 10px;
    color: #6A6A6A;
    text-decoration: none;
    font-weight: bold;
}

#blog-pager {
    clear: both;
}
</style>
</b:if>
</b:if>

Customizing the Magazine Layout

1. At the beginning of the script from step 6, we have this section:
posts_no_thumb_sum = 290;
posts_thumb_sum = 240;
img_thumb_height = 80;
img_thumb_width = 80;
first_no_thumb_sum = 580;
first_thumb_sum = 450;
img_thumb_height1 = 145;
img_thumb_width1 = 165;
  • the first number is the number of characters for the small posts when there will be no image available
  • the 2nd number is the number of characters that will show when the small posts will have an image
  • the 3rd and the 4th line is for the height and width of the small posts thumbnails (images).
  • the same goes for what is in blue, but this affects only the first post. Since the first post is wider, it may contain a larger number of characters and we'll be able to make the thumbnail size larger.
2. And finally, we have the CSS styles. That last thing we added is a code that determines how the posts are going to look on the homepage - and archive pages as well, except for the first post.

To change the width and height, respectively the size for the first post container, look for these lines:
width: auto;
height: 250px;
Underneath the first post are the values for the other posts, just look for this part:
width: 46%;
height: 230px;
The width will ocuppy 46% of the main column width and height is set to 230px. Here you may need to experiment a bit with the sizes in order to make them appear correctly.

Finally, set the number of posts to show on the homepage, so that there won't be any empty space. Go to Settings > Posts and comments > Show at most and select the number of posts that you want to appear.

Thứ Hai, 23 tháng 12, 2013

Popular Posts Widget for Christmas

The Christmas countdown has begun and while homes are decorated with colorful lights and the sweet smell of pine trees, there's no reason why we wouldn't decorate our Blogspot blog with Christmas bells next to the Popular Posts widget for Blogger!

So, today I was playing around a bit with CSS and I was thinking that it would be cool to add some fresh styles to the Popular Posts widget in such a way to look just ready for the forthcoming Christmas holiday.

popular posts widget, blogger gadgets

To see a demo for the Popular Posts widget for Christmas, please visit the demo blog:


How to Add Popular Posts Widget with Christmas Bells in Blogger

Step 1. Log in to your Blogger Dashboard, then go to 'Template' and click the 'Edit HTML' button:


Step 2. Click anywhere inside the code area and press the CTRL + F keys, then search for this tag:
</head>
Step 3. Just above the </head> tag, add the following CSS code:
<style>
#PopularPosts1 .item-thumbnail:before{
display: block;
content: url('https://blogger.googleusercontent.com/img/b/R29vZ2xl/AVvXsEg06d-ZOawAP314MR3gIB124CoaTyKyVfbn_-5VwYjQSBnDqsCTFNoYvfcSKuOv0lN78h8NZWSdaY88kx7wSt6xzWVAXBN3QQDMwYrFqDkYkipoO4HvJElbKtp33iCPrOO93t3HbcWjZnmQ/s1600/bells.png');
margin-left: -15px;
margin-top: -5px;
z-index: 2;
position: absolute;
}
#PopularPosts1 .item-thumbnail img{
float:left;
margin:5px;
padding: 2px;
border: 6px solid #FED74C;
height: 72px;
width: 92px;
position: relative;
background: #F11C25;
-webkit-box-shadow: 2px 2px 5px rgba(0,0,0,0.3);
-moz-box-shadow: 2px 2px 5px rgba(0,0,0,0.3);
box-shadow: 2px 2px 5px rgba(0,0,0,0.3);
transition: opacity 1s ease;
}
#PopularPosts1 ul li:nth-child(odd){
  -ms-transform:rotate(20deg); /* IE 9 */
  -moz-transform:rotate(20deg); /* Firefox */
  -webkit-transform:rotate(20deg); /* Safari and Chrome */
  -o-transform:rotate(20deg); /* Opera */
 -webkit-transition: all 0.2s ease-in-out;
-moz-transition: all 0.2s ease-in-out;
-o-transition: all 0.2s ease-in-out;
transition: all 0.2s ease-in-out;
}
#PopularPosts1 ul li:nth-child(even){
  -ms-transform:rotate(-40deg); /* IE 9 */
  -moz-transform:rotate(-40deg); /* Firefox */
  -webkit-transform:rotate(-40deg); /* Safari and Chrome */
  -o-transform:rotate(-40deg); /* Opera */
 -webkit-transition: all 0.2s ease-in-out;
-moz-transition: all 0.2s ease-in-out;
-o-transition: all 0.2s ease-in-out;
transition: all 0.2s ease-in-out;
}
#PopularPosts1 ul li:nth-child(odd):hover{
  -ms-transform:rotate(0deg); /* IE 9 */
  -moz-transform:rotate(0deg); /* Firefox */
  -webkit-transform:rotate(0deg); /* Safari and Chrome */
  -o-transform:rotate(0deg); /* Opera */
}
#PopularPosts1 ul li:nth-child(even):hover{
  -ms-transform:rotate(0deg); /* IE 9 */
  -moz-transform:rotate(0deg); /* Firefox */
  -webkit-transform:rotate(0deg); /* Safari and Chrome */
  -o-transform:rotate(0deg); /* Opera */
}
#PopularPosts1 ul li{
display: inline-block;
float: left;}
#PopularPosts1 .item-thumbnail{
width: 70px;
}
#PopularPosts1 li{
margin-right: 15px;
}
#PopularPosts1 .item-snippet, .item-title{
display: none;
} </style>
Step 4. Click the 'Save Template' button to save the changes and you're done. Enjoy!

Also, please check out this tutorial on how to add falling snowflakes in the background of a Blogger blog.

Chủ Nhật, 22 tháng 12, 2013

How to Use Character Entities in CSS, HTML and JavaScript

Sometimes, when using scripts, we must write special characters like accents by using a special set of codes called character entities. However, these don't always look good or we get a question mark or other strange symbols. Usually, this is solved if the character encoding is done right but the logic may not always work.

In Blogger, special characters most of the time appear correctly, but when it is about other services, like external files, things can get complicated.

For example, this usually looks good and when you click on this link, you should see the letters in the right way:
alert(" á é í ó ú  ☺ ✛ ❤ ");
If we are trying to use other method and we want to use this type of characters, sometimes we need to write them in a special format called escape sequence which is nothing but a backslash followed by a letter and a number in hexadecimal format. In the case of common characters or accents, it would be \x followed by two hex digits:
\xe1 is the letter á
\xe9 is the letter é
\xed is the letter í
\xf3 is the letter ó
\xfa is the letter ú
Other combinations generate special characters:
\n is a line break
\t is the tab character
\' is single quote
\" is double quote
\\ is a back slash
Or we can use \u followed by the Unicode character code expressed as four hexadecimal digits:
\u00e1 is the letter á
\u00e9 is the letter é
\u00ed is the letter í
\u00f3 is the letter ó
\u00fa is the letter ú
This will allow us to see correctly what we couldn't before if we were using some other services:
alert(" \u263a \u2764 \u271b ");
On this page you can find a comprehensive list of all the characters, both symbols and different alphabets.

Although rare characters are not often used in the CSS, there is a case when they are necessary as well, like when using the content property with the :after and :before pseudo-elements.

The same criteria applies there, but we only need to add a backslash followed by the four-digit hexadecimal code. For example:
content: ":\24d1\24d4\24d5\24de\24e1\24d4";

content: ":after  \263a  \2724  \2602";
:ⓑⓔⓕⓞⓡⓔ
:after ☺ ✤ ☂

Remember that IE doesn't understand the :before pseudoclass with content, and you would have to set the list-style-type property as none, or you would get 2 bullets in CSS compliant browsers.

Thứ Bảy, 21 tháng 12, 2013

How to Create a Sitemap or Table of Contents in Blogger

One of the limitations of a blog is that it doesn't have an index or sitemap of the site to make it easier for readers to find the content that they are searching for. While the blog archive and labels have all the information about the published post, these do not appear on a single page completely, so searching for more posts is not always easy.

Luckily, this gadget will help you to add a table of contents or sitemap on Blogger showing the index of all posts separated by categories that have been published. It will also show the latest posts with a text saying New!

table of contents, sitemap, blogger

Demo: You can see it in action by clicking here.

How To Add a Sitemap with a List of Posts to Blogger

To implement it on your blog, follow the steps below:

Step 1. Login to your Blogger Dashboard and select your blog

Step 2. Go to "Pages" > click the "New Page" button.

Step 3. Click on the HTML tab and paste the following code inside the empty box:
<style>
p.labels a{color: #242424; text-transform: uppercase;font-size: 15px;}
a.post-titles {color: #0000FF;}
ol li{list-style-type:decimal;line-height:25px;}
</style>
<script>
//<![CDATA[
var postTitle=new Array();var postUrl=new Array();var postPublished=new Array();var postDate=new Array();var postLabels=new Array();var postRecent=new Array();var sortBy="titleasc";var tocLoaded=false;var numChars=250;var postFilter="";var numberfeed=0;function bloggersitemap(a){function b(){if("entry" in a.feed){var d=a.feed.entry.length;numberfeed=d;ii=0;for(var h=0;h<d;h++){var n=a.feed.entry[h];var e=n.title.$t;var m=n.published.$t.substring(0,10);var j;for(var g=0;g<n.link.length;g++){if(n.link[g].rel=="alternate"){j=n.link[g].href;break}}var o="";for(var g=0;g<n.link.length;g++){if(n.link[g].rel=="enclosure"){o=n.link[g].href;break}}var c="";if("category" in n){for(var g=0;g<n.category.length;g++){c=n.category[g].term;var f=c.lastIndexOf(";");if(f!=-1){c=c.substring(0,f)}postLabels[ii]=c;postTitle[ii]=e;postDate[ii]=m;postUrl[ii]=j;postPublished[ii]=o;if(h<10){postRecent[ii]=true}else{postRecent[ii]=false}ii=ii+1}}}}}b();sortBy="titleasc";sortPosts(sortBy);sortlabel();tocLoaded=true;displayToc2();document.write('</br><div class="sitemap-link"><a href="http://helplogger.blogspot.com/2013/12/add-sitemap-table-of-contents-to-blogger.html" style="font-size: 10px; text-decoration:none; color: #5146CD;">Get This Widget</a></div>')}function filterPosts(a){scroll(0,0);postFilter=a;displayToc(postFilter)}function allPosts(){sortlabel();postFilter="";displayToc(postFilter)}function sortPosts(d){function c(e,g){var f=postTitle[e];postTitle[e]=postTitle[g];postTitle[g]=f;var f=postDate[e];postDate[e]=postDate[g];postDate[g]=f;var f=postUrl[e];postUrl[e]=postUrl[g];postUrl[g]=f;var f=postLabels[e];postLabels[e]=postLabels[g];postLabels[g]=f;var f=postPublished[e];postPublished[e]=postPublished[g];postPublished[g]=f;var f=postRecent[e];postRecent[e]=postRecent[g];postRecent[g]=f}for(var b=0;b<postTitle.length-1;b++){for(var a=b+1;a<postTitle.length;a++){if(d=="titleasc"){if(postTitle[b]>postTitle[a]){c(b,a)}}if(d=="titledesc"){if(postTitle[b]<postTitle[a]){c(b,a)}}if(d=="dateoldest"){if(postDate[b]>postDate[a]){c(b,a)}}if(d=="datenewest"){if(postDate[b]<postDate[a]){c(b,a)}}if(d=="orderlabel"){if(postLabels[b]>postLabels[a]){c(b,a)}}}}}function sortlabel(){sortBy="orderlabel";sortPosts(sortBy);var a=0;var b=0;while(b<postTitle.length){temp1=postLabels[b];firsti=a;do{a=a+1}while(postLabels[a]==temp1);b=a;sortPosts2(firsti,a);if(b>postTitle.length){break}}}function sortPosts2(d,c){function e(f,h){var g=postTitle[f];postTitle[f]=postTitle[h];postTitle[h]=g;var g=postDate[f];postDate[f]=postDate[h];postDate[h]=g;var g=postUrl[f];postUrl[f]=postUrl[h];postUrl[h]=g;var g=postLabels[f];postLabels[f]=postLabels[h];postLabels[h]=g;var g=postPublished[f];postPublished[f]=postPublished[h];postPublished[h]=g;var g=postRecent[f];postRecent[f]=postRecent[h];postRecent[h]=g}for(var b=d;b<c-1;b++){for(var a=b+1;a<c;a++){if(postTitle[b]>postTitle[a]){e(b,a)}}}}function displayToc(a){var l=0;var h="";var e="Post Title";var m="Click to sort by title";var d="Date";var k="Click to sort by date";var c="Category";var j="";if(sortBy=="titleasc"){m+=" (descending)";k+=" (newest first)"}if(sortBy=="titledesc"){m+=" (ascending)";k+=" (newest first)"}if(sortBy=="dateoldest"){m+=" (ascending)";k+=" (newest first)"}if(sortBy=="datenewest"){m+=" (ascending)";k+=" (oldest first)"}if(postFilter!=""){j="Click to view all"}h+="<table>";h+="<tr>";h+='<td class="header1">';h+='<a href="javascript:toggleTitleSort();" title="'+m+'">'+e+"</a>";h+="</td>";h+='<td class="header2">';h+='<a href="javascript:toggleDateSort();" title="'+k+'">'+d+"</a>";h+="</td>";h+='<td class="header3">';h+='<a href="javascript:allPosts();" title="'+j+'">'+c+"</a>";h+="</td>";h+='<td class="header4">';h+="Read all";h+="</td>";h+="</tr>";for(var g=0;g<postTitle.length;g++){if(a==""){h+='<tr><td class="entry1"><a href="'+postUrl[g]+'">'+postTitle[g]+'</a></td><td class="entry2">'+postDate[g]+'</td><td class="entry3">'+postLabels[g]+'</td><td class="entry4"><a href="'+postPublished[g]+'">Read</a></td></tr>';l++}else{z=postLabels[g].lastIndexOf(a);if(z!=-1){h+='<tr><td class="entry1"><a href="'+postUrl[g]+'">'+postTitle[g]+'</a></td><td class="entry2">'+postDate[g]+'</td><td class="entry3">'+postLabels[g]+'</td><td class="entry4"><a href="'+postPublished[g]+'">Read</a></td></tr>';l++}}}h+="</table>";if(l==postTitle.length){var f='<span class="toc-note">Show All '+postTitle.length+" Posts<br/></span>"}else{var f='<span class="toc-note">Show '+l+" posts by category '";f+=postFilter+"' the "+postTitle.length+" Total Posts<br/></span>"}var b=document.getElementById("toc");b.innerHTML=f+h}function displayToc2(){var a=0;var b=0;while(b<postTitle.length){temp1=postLabels[b];document.write("<p/>");document.write('<p class="labels"><a href="/search/label/'+temp1+'">'+temp1+"</a></p><ol>");firsti=a;do{document.write("<li>");document.write('<a class="post-titles" href="'+postUrl[a]+'">'+postTitle[a]+"</a>");if(postRecent[a]==true){document.write(' - <strong><span style="color: rgb(255, 0, 0);">New!</span></strong>')}document.write("</li>");a=a+1}while(postLabels[a]==temp1);b=a;document.write("</ol>");sortPosts2(firsti,a);if(b>postTitle.length){break}}}function toggleTitleSort(){if(sortBy=="titleasc"){sortBy="titledesc"}else{sortBy="titleasc"}sortPosts(sortBy);displayToc(postFilter)}function toggleDateSort(){if(sortBy=="datenewest"){sortBy="dateoldest"}else{sortBy="datenewest"}sortPosts(sortBy);displayToc(postFilter)}function showToc(){if(tocLoaded){displayToc(postFilter);var a=document.getElementById("toclink")}else{alert("Just wait... TOC is loading")}}function hideToc(){var a=document.getElementById("toc");a.innerHTML="";var b=document.getElementById("toclink");b.innerHTML='<a href="#" onclick="scroll(0,0); showToc(); Effect.toggle(\'toc-result\',\'blind\');">?? Display Table of Contents</a> <img src="https://blogger.googleusercontent.com/img/b/R29vZ2xl/AVvXsEggjUELv9Q8UbR6HIkrJxdQfNHsWkTOS0-rJ5kuvVjmyP29eLDJVmtfGFyZ0NvHeHxzk7MxDPuW3WYdBrWO0geNOGQfItEPgrTIrXFJVzSZph91wGZnjvnrltmKZIhDdxKKoapW1ge9f9jp/s1600/new_icon.gif"/>'}function looptemp2(){for(var a=0;a<numberfeed;a++){document.write("<br>");document.write('Post Link : <a href="'+postUrl[a]+'">'+postTitle[a]+"</a><br>");document.write('Read all : <a href="'+postPublished[a]+'">'+postTitle[a]+"</a><br>");document.write("<br>")}};
//]]>
</script>
<script src="http://helplogger.blogspot.com/feeds/posts/default?max-results=9999&amp;alt=json-in-script&amp;callback=bloggersitemap"></script>
After adding the above code, replace http://helplogger.blogspot.com with the address of your blog.

How to Customize the Sitemap for Blogger

  • to change the color and font size of categories title, replace the values in red
  • to change the color of the links, replace the value in green
Step 4. Click "Options" on the right side of the post editor and select "Don't allow, hide existing" for the Reader comments.

Step 5. Finally, click the "Publish" button and see the page. That's it!

The index of the posts is sorted alphabetically and is updated automatically each time a new post is published.

Thứ Năm, 19 tháng 12, 2013

Using JQuery + EasyDrag to Move Elements or Images by Clicking on Them

This is a simple and easy-to-use jQuery plugin which enables drag and drop functionality to make your site more interactive so that readers can "play" with certain elements on the page by dragging them from one side to another. For example, they can drag the images with a script to move them on any part of the blog just with a mouse click.


Drag and Drop Elements or Images on click with jQuery & EasyDrag

To see how this works, please visit the demo blog and click on any item, then move it anywhere on the screen:


Adding EasyDrag & jQuery to Move Elements or Images in Blogger

1. Login to your Blogger account, go to 'Template' and click the 'Edit HTML' button:


2. Click anywhere inside the template's code and press the CTRL + F keys to search for this tag:
</head>
3. Just before </head> paste the following scripts:
<script src='http://code.jquery.com/jquery-latest.js' type='text/javascript'/>
<script type='text/javascript'>
//<![CDATA[
(function($){var isMouseDown=false;var currentElement=null;var dropCallbacks={};var dragCallbacks={};var lastMouseX;var lastMouseY;var lastElemTop;var lastElemLeft;var dragStatus={};$.getMousePosition=function(e){var posx=0;var posy=0;if(!e)var e=window.event;if(e.pageX||e.pageY){posx=e.pageX;posy=e.pageY;}
else if(e.clientX||e.clientY){posx=e.clientX+document.body.scrollLeft+document.documentElement.scrollLeft;posy=e.clientY+document.body.scrollTop+document.documentElement.scrollTop;}
return{'x':posx,'y':posy};};$.updatePosition=function(e){var pos=$.getMousePosition(e);var spanX=(pos.x-lastMouseX);var spanY=(pos.y-lastMouseY);$(currentElement).css("top",(lastElemTop+spanY));$(currentElement).css("left",(lastElemLeft+spanX));};$(document).mousemove(function(e){if(isMouseDown&&dragStatus[currentElement.id]=='on'){$.updatePosition(e);if(dragCallbacks[currentElement.id]!=undefined){dragCallbacks[currentElement.id](e,currentElement);}
return false;}});$(document).mouseup(function(e){if(isMouseDown&&dragStatus[currentElement.id]=='on'){isMouseDown=false;if(dropCallbacks[currentElement.id]!=undefined){dropCallbacks[currentElement.id](e,currentElement);}
return false;}});$.fn.ondrag=function(callback){return this.each(function(){dragCallbacks[this.id]=callback;});};$.fn.ondrop=function(callback){return this.each(function(){dropCallbacks[this.id]=callback;});};$.fn.dragOff=function(){return this.each(function(){dragStatus[this.id]='off';});};$.fn.dragOn=function(){return this.each(function(){dragStatus[this.id]='on';});};$.fn.easydrag=function(allowBubbling){return this.each(function(){if(undefined==this.id||!this.id.length)this.id="easydrag"+(new Date().getTime());dragStatus[this.id]="on";$(this).css("cursor","move");$(this).mousedown(function(e){$(this).css("position","absolute");$(this).css("z-index","10000");isMouseDown=true;currentElement=this;var pos=$.getMousePosition(e);lastMouseX=pos.x;lastMouseY=pos.y;lastElemTop=this.offsetTop;lastElemLeft=this.offsetLeft;$.updatePosition(e);return allowBubbling?true:false;});});};})(jQuery);
//]]>
</script>
Note: If you already have jQuery, please remove the code in red.

4. Save the changes by clicking the 'Save template' button.

How to Move Elements or Images on Click Using EasyDrag & jQuery

Now, when you want to use EasyDrag to drag and drop an image, use the code below inside the HTML of your post or page (create a New post, then switch to the HTML tab):
<img id="easydrag1" src="image-URL" style="border: 0px none; cursor: move;" />
<script type="text/javascript">
$(function(){ $("#easydrag1").easydrag();});
</script>
Note: change the text in blue with the URL of your image and please note that each image has an unique id. Here, for example, the id is called easeydrag1 which has been added both in the HTML of the image and JavaScript function.

If you need to use EasyDrag to move a second element, then add your image with a different id, for example easydrag2, otherwise it won't work:
<img id="easydrag1" src="image-URL" style="border: 0px none; cursor: move;" />
<script type="text/javascript">
<img id="easydrag2" src="image-URL" style="border: 0px none; cursor: move;" />
<script type="text/javascript">
$(function(){ $("#easydrag1").easydrag();});
$(function(){ $("#easydrag2").easydrag();});
</script>

How to add a link to a draggable image?

We will add a JavaScript event, so that when we will double click on the image, to open the page we want.

The code to use should look something this:
<img id="easydrag1" style="cursor:move; border:0px;" ondblClick="javascript:window.open('link-URL')" src="image-URL" /><script type="text/javascript">
$(function(){ $("#easydrag1").easydrag();});
</script>
Using the script above, the image can be dragged around easily and be activated by double clicking on it.